Managed Internet Update (MIU) Administrator
The MIU is an internet driven fix delivery program for New World ERP. Through the MIU, we can deploy any fixes that go in the standard New world Systems folder for new world ERP. We can also deploy SSRS reports and SQL files to the ERP, eSuite, RuntimeServices or HR Reporting databases.
This topic steps you through the installation and configuration of the MIU, the installation and scheduling of fixes, MIU dependency mechanics, the viewing of installed fixes and MIU deployment scenarios.
Getting the MIU
The MIU is packaged with the new world ERP Installer. Once it is installed, the MIU updates itself on your Application Server automatically if configured to do so. The MIU is separate of the new world ERP software in that one MIU install can service several versions of new world ERP. See the automatic update MIU option in the Miscellaneous Settings section for information on the MIU auto-update function.
Installing the MIU
Note: On Windows Server 2008 environments, Microsoft SQL Server 2008 Shared Management Objects (x86) is a pre-requisite for the MIU. This program would be installed on the server where you are installing the MIU and not on the database server. You can download the program from Microsoft.
Note: Appendix A provides links to videos that help with the installation scenarios for the different types of environments. You may use the videos as a replacement or a supplement to this documentation.
- To install the MIU, open up the MIU Setup program (MIU4Setup.exe) on your new world ERP Application Server. In the software download pack, you will find this in a Managed Internet Update (MIU) folder.
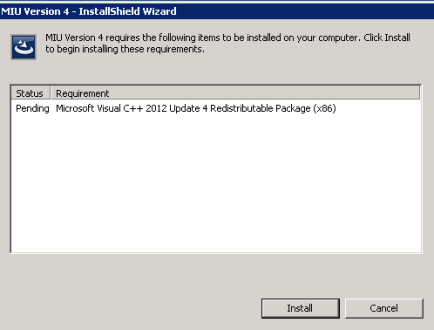
- If your server does not have Microsoft Visual C++ 2012 on it, you will see this screen. Click Install. This pre-requisite will be installed within the MIU installer.
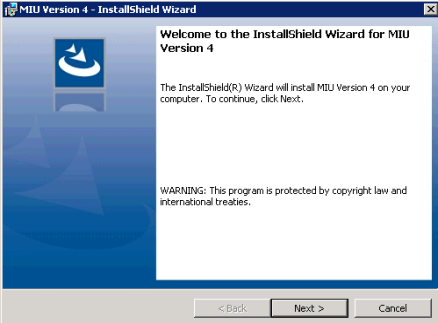
- Click Next on the first screen.
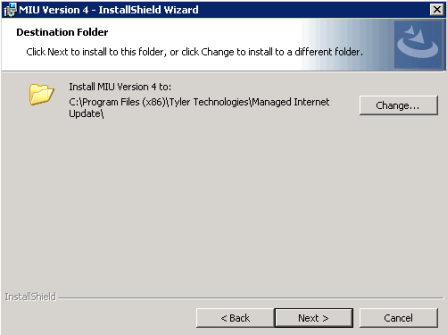
- Select the default location (preferred) or browse to change to your application drive. Click Next.
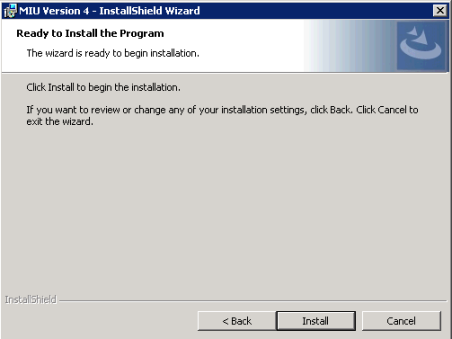
- Click Install.
- Click Finish when the install completes. The MIU will now show as a shortcut on the desktop of your Application Server (below).

Initial Configuration
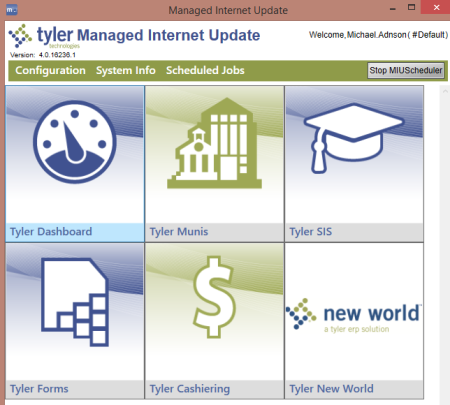
Double click on the MIU icon on the desktop. When opening the MIU, you will see a screen like this:

Click on the Configuration drop-down and the MIUConfiguration option. Several options are available. We will detail them below the screenshot.
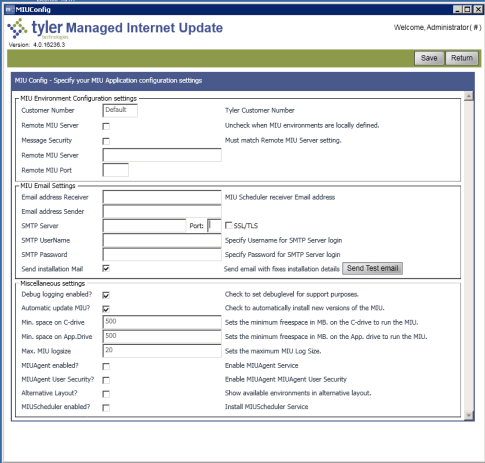
MIU Environment Configuration Settings
Customer Number-Leave as is
Remote MIU Server Settings-Please ignore this section
MIU Email Settings
Email Address Receiver-If you would like for a user or distribution group at your site to be alerted to successful or failed MIU fix applications, put their email address in here.
Email Address Sender-This can be any email address and should be an email address you know is unmonitored. Items like NoReply@cityname.com may make sense here.
SMTP Server and Port-Your SMTP server information for sending email. The Port would typically be 25.
SMTP UserName and Password-If you need user name and password authenticate to your SMTP server, you can put the authentication information here.
Send Installation Email-If selected, this triggers whether or not to send an email upon fix application.
Send Test Email-This button will send a test email to your configured email address to ensure email is working. This will be the litmus test for if you would get success and failure emails after applying a fix with the Send Installation Email checkbox selected.
Note: You will only get success and failure emails from fixes if this checkbox is checked.
Miscellaneous Settings
Debug Logging Enabled?-This option will enable more debug logging in the Event Viewer. We recommend this be unchecked unless doing diagnostic testing. Log entries go to Application and Services Logs > MIU in the Event Viewer.
Automatic Updating MIU-This option will ensure the MIU keeps itself updated with the latest version of the product. We recommend that this item be checked to ensure the MIU can patch itself.
Min and Max file sizes-Leave as defaults
MIUAgent Enabled-Please disregard
MIUAgent User Security-Please disregard
Alternative Layout-Please disregard
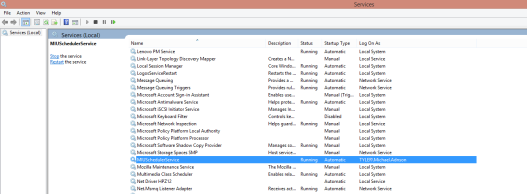
MIU Scheduler Enabled-To enable the MIU Scheduler to allow the scheduling of unattended fixes, click this box. It will expand to allow you to save a user name and password with which to run the MIUSchedulerService. This user should be an administrator on the Application Server to allow for file copies.
Note: Once this checkbox has been selected and saved with user credentials, you will not see this checkbox again in configuration. At that point, it would be managed in Services Manager on the server. The Service name is MIUSchedulerService.
Configuring your New world ERP Environment with the MIU
Note: There is a video for this section referenced in Appendix A.
- To configure your new world ERP environment within the MIU, please open the MIU to the splash start screen by double clicking the MIU icon on the desktop. You will need to click on the Tyler New world logo on this page.
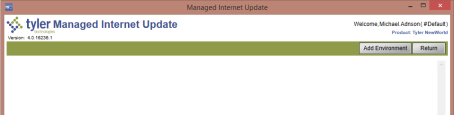
- Initially no environment will be configured and you will see a screen like the below. Click Add Environment.
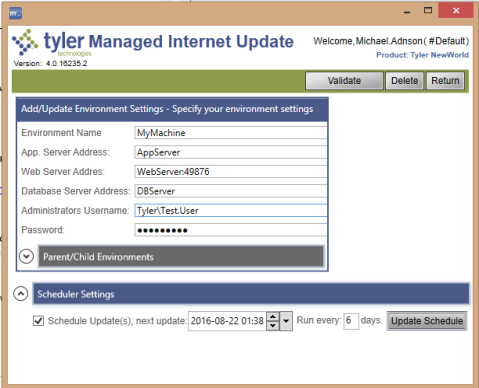
- Enter your environmental variables for the Application, Web, Database Server names as well as an Admin user on the application server. If the Web (often called eSuite) Server is not the same machine as the Application Server, see the Environments with separate web servers (eSuite) section of this document.
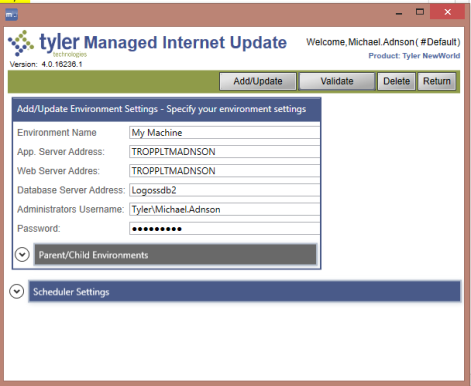
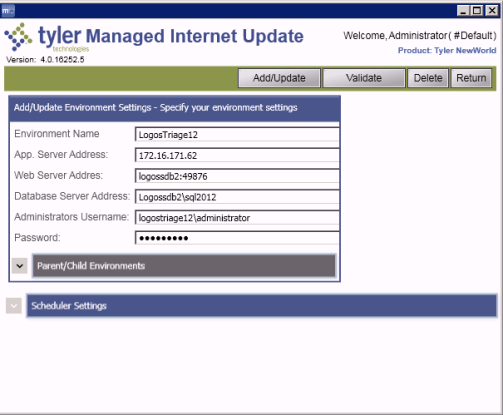
- Click the Validate button. Once the environment validates, an Add/Update button will display. Once you click Add/Update, your environment is now added in the list. Click Return to see the Environment list.
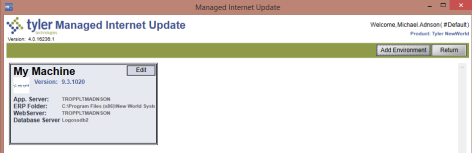
- Clicking anywhere in the Environment tile, aside from the Edit button, will take you into the MIU environment itself.
Environments with separate web servers (eSuite)
In most live environments, a separate web server will be used for eSuite. The following steps will allow you to install the MIUAgent on the web server and get it configured to work with the MIU on the Application Server to deploy fixes to the web server.
Installing the MIU Web Server Agent
Note: There is a video for this section referenced in Appendix A.
The MIU Agent install (like the standard MIU install) is packaged with the New world installation package. You can find a copy of the MIU Agent in the Managed Internet Update (MIU) folder of the downloaded install package.
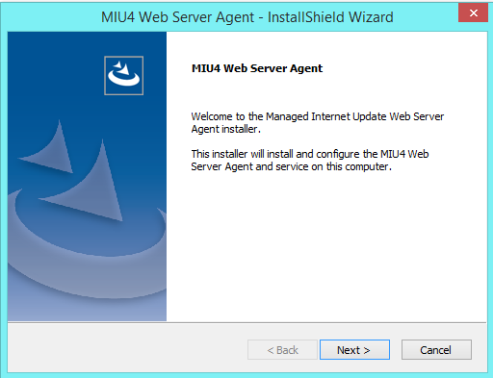
- To install the MIU Agent, copy the MIU4WebServerAgentInstaller.exe program to the desktop or similar location on the web (eSuite) server. Double click the installer on that server.
- The installer will open with prompts to the user. Click Next on the first prompt.
- The logon screen requests a user who has rights to run a service on the web server. This user should be an administrator on the server, whether local or domain. Enter your admin user and click Next.
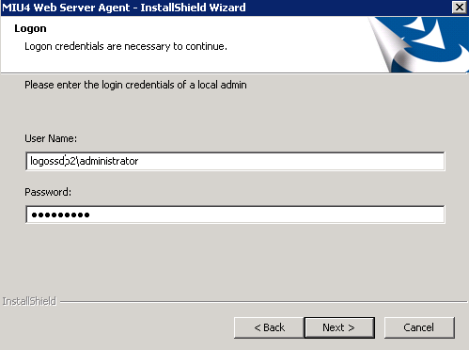
Note: The user in this screen needs to have Log On as a Service rights on the eSuite server. More information about giving a user Log On as a Service rights is in Appendix B of this document.
- Please enter either your IP address or server name in this prompt. This prompt has to be able to resolve from your Application Server to this Web Server.
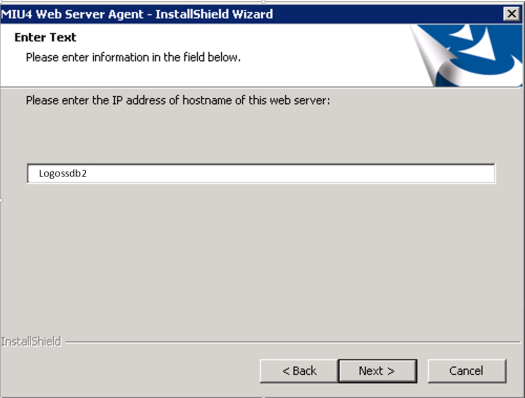
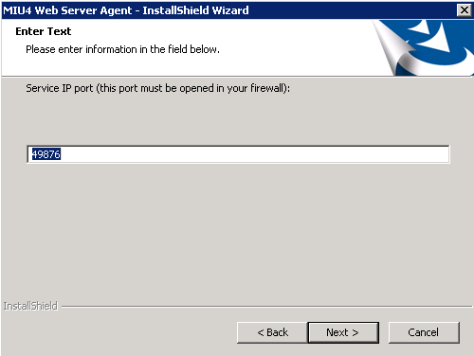
- The MIU Web Server Agent listens for commands on a port to simplify firewall rules. The default is 49876. Please leave this port as is and adjust the firewall (if needed) for the Application Server to be able to contact the web server on this port. If you need to change the port, please contact support as configuration will need to change slightly in the MIU environment variable. Click Next.
- The MIU Agent will now install to the web server. A service called MIU4 Web Server Agent will now be installed on your web server. It should be set to automatic and start automatically as part of the install.

Configuring an environment for a separate Web Server
- As described in the Configuring your new world ERP Environment with the MIU section of this document, please click into the environment configuration screen for Tyler New world within the MIU.
- Within the environment variable, the setup would be similar to what is described in the above section, however enter a location name for the Application Server that the Web Server can see, i.e., Fully Qualified Domain Name, IP Address or Server Name. In the Web Server Address field, type either the IP Address of the Web Server or name (whatever the Application Server can resolve) followed by port 49876.
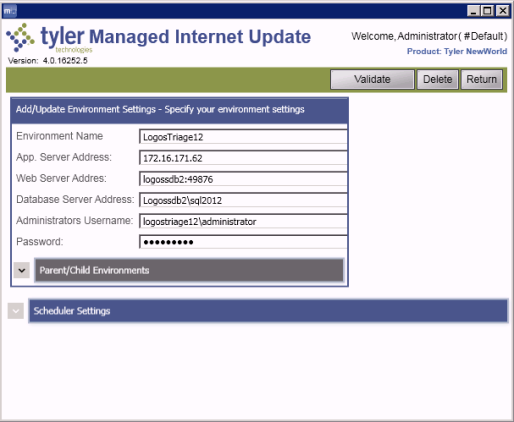
- Click Validate to validate the environment. This setting will find the install location of the eSuite websites on the eSuite server and store it in configuration.
- After validation is complete, click the Add/Update button to store the environment in the MIU.
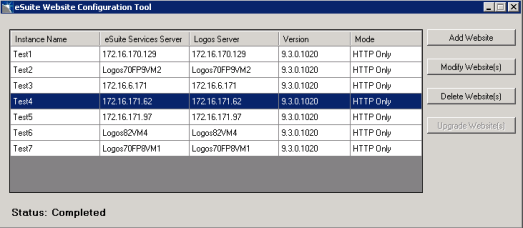
Note: If the web server is running the multi-instance website installation, one of the eSuite instances’ eSuite Server Names (below) needs to match the Application Server Address (from above) exactly to be able to push eSuite fixes to that instance of the website. In the below screenshot, Instance Name Test4 is an exact match on the web server. In this case, any web server fixes pushed to this web server would go to Instance Test4.
Checking for and Installing Fixes
Note: A video supplement for this section is referenced in Appendix A.
- When you click into your environment for the MIU, you will be greeted with a screen like this:

- Clicking on the Fixes drop-down will provide a Check for available fixes option.
- When you click on the Check for available fixes option, the software will check the applicable databases and servers to see what software is installed and what fixes are already installed that are published. Only fixes that are not installed will display.

Note: Only fixes for modules the customer is licensed to will show up in this display. For example, if there are no users for HR in the license key on the application server, HR would not display here.
- To install a fix there are several options. If you check the check all checkbox at the top of the list of fixes, all fixes would be installed if you selected them and click Install on the right. The other option is to expand a product line, then click an individual fix to either install it or schedule the install for off hours in an unattended fix application.
Note: This feature requires the MIUSchedulerService to be running. This service is discussed in the Scheduling Fixes section of this document.
- Fixes already installed will not show up again in the list of MIU fixes.
Scheduling Fixes (not recommended in live unless the fixes have been tested)
Note: Videos for Applying and Scheduling fixes are referenced in Appendix A.
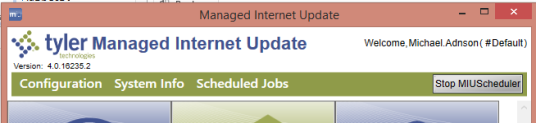
- Fixes can be scheduled through the MIU to happen either automatically at a certain time during the week, or on a one-off basis. The MIU Scheduler runs on the MIUSchedulerService.
- This service can also be turned on or off when you open the MIU with the Start MIUScheduler/Stop MIUScheduler button.
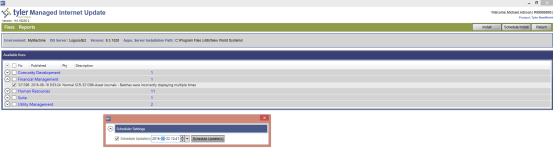
- If you would like to schedule all MIU updates to apply themselves on a schedule, MIU Fixes can be scheduled to recur starting on a given date and time, and every X days after that time. All fixes will be applied when the recurrence happens. The settings for this are in the Scheduler Settings bar of the MIU Environment itself.
MIU Dependency Mechanics
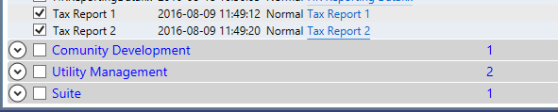
The MIU maintains fix dependencies within its functionality. If you click on a fix that you want to apply and another fix is automatically selected, that fix you clicked is dependent on the fix the software selected for you. Below, Tax Report 2 was selected and Tax Report 1 was auto-selected. You have two options, apply both fixes or apply the first fix and the second fix afterward. You will not be able to apply just the second fix.
Viewing Installed Fixes
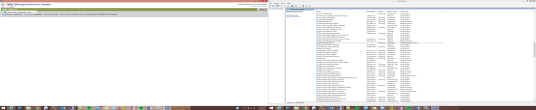
Two reports are packaged with the MIU. To see them, you would click the drop-down for the Reports menu and click on the applicable report.

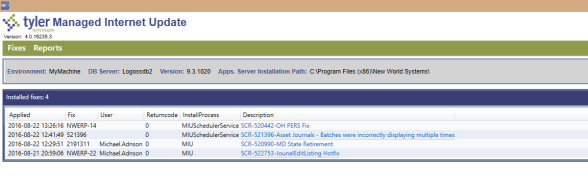
Installed Fixes
This report will show the user which fix packages have been installed as well as if they were manually installed or scheduled via the scheduling service.
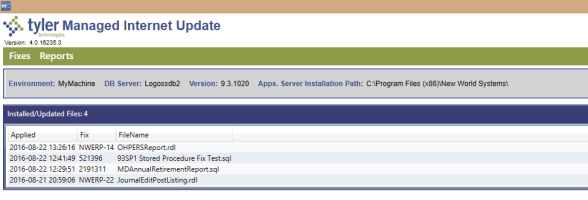
Installed/Updated Files
This report will itemize files that have been updated as well as what fix they were updated by for a cross-reference.
Viewing patches in the database
Each MIU fix includes an update to the App.DatabaseHotfixes table in the appropriate database. eSuite fixes will update the App.DatabaseHotfixes table in the eSuite database, ERP fixes the ERP database, etc. To see what has applied within your database, run this query.
Select * from App.DatabaseHotfixes

Sites without Internet Access on Application Server
Note: Please follow the videos in Appendix A for this scenario.
If your Application Server does not have internet access or you wish to not download the fixes from the Application Server, an option is available in the MIU.
Requirements for this option:
- Need to know an Admin user name on the Application Server and that user’s password. This is required for file copies. This option works best on machines with domains.
- A user machine connected to the internet to do the downloading and file copies to the Application Server. This is done behind the scenes by the MIU.
Installation Instructions for a Remote MIU Deployment:
- Follow the Installing the MIU and Initial Configuration sections of this document on a machine of your choosing that is not the Application Server, however when configuring the environment for the MIU, a key change is needed. The App. Server Address would be the name of the Application Server that you want to remotely deploy fixes to. The Administrator’s Username and Password will be an admin on that server.
Note: The user running the MIU on the remote machine will need to be an administrator on the Application Server if the two machines do not reside on the same domain.
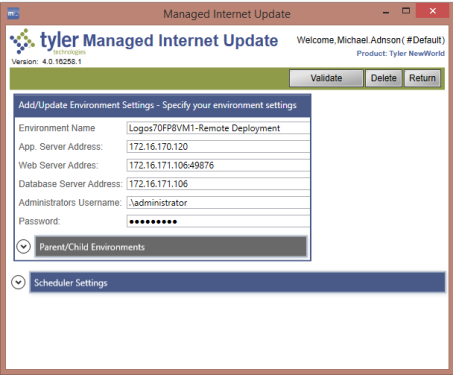
- The Validation and Add/Update steps remain the same.
Firewall Considerations
The MIU will connect to https://tylersftp.tylertech.com over port 443 (SSL). This communication needs to be open for the MIU to function. If there are separate eSuite and App Servers, port 49876 (default) needs to be open both ways through the internal firewall between these servers.
File Uploads
The MIU uploads a log back to the FTP when a fix has been applied as well as the environment/database that the fix was applied to. This provides the ability to notify customers that have applied a particular fix if a change or new patch is needed.
Appendix A – MIU Deployment Scenarios
The MIU can be deployed in several different ways to give flexibility to the user and environmental needs. The following matrix illustrates the options for MIU deployment.
Scenario 1: I have a dedicated eSuite server for my Application Server and my Application Server has internet access.
Watch these videos in order to get your server configured:
|
Order |
Video |
Applies to App Server |
Applies to eSuite Server |
|---|---|---|---|
|
1 |
|
X |
|
|
2 |
X |
|
|
|
3 |
Configuring an Environment with a Dedicated eSuite Server (Required) |
X |
|
|
4 |
X |
|
|
|
5 |
X |
|
|
|
6 |
X |
|
|
|
7 |
X |
|
Scenario 2: I do not have a dedicated eSuite server (this could include customers with eSuite running from the Application Server or customers that do not license eSuite) and my Application Server has internet access.
Watch these videos in order to get your server configured:
|
Order |
Video |
Applies to App Server |
Applies to eSuite Server |
|---|---|---|---|
|
1 |
X |
|
|
|
2 |
X |
|
|
|
3 |
X |
|
|
|
4 |
X |
|
|
|
5 |
X |
|
|
|
6 |
X |
|
Scenario 3: I do not have internet access on my Application Server and want to run the MIU from a user machine. I have a dedicated eSuite Server.
|
Order |
Video |
Applies to User Machine |
Applies to eSuite Server |
|---|---|---|---|
|
1 |
|
X |
|
|
2* |
X |
|
|
|
3 |
Configuring an Environment without Internet Access (Required) |
X |
|
|
4 |
X |
|
|
|
5 |
X |
|
|
|
6 |
X |
|
|
|
7 |
X |
|
Scenario 4: I do not have internet access on my Application Server and want to run the MIU from a user machine. I do not have a dedicated eSuite Server.
|
Order |
Video |
Applies to App Server |
Applies to eSuite Server |
|---|---|---|---|
|
1* |
X |
|
|
|
2 |
Configuring an Environment without Internet Access (Required) |
X |
|
|
3 |
X |
|
|
|
4 |
X |
|
|
|
5 |
X |
|
|
|
6 |
X |
|
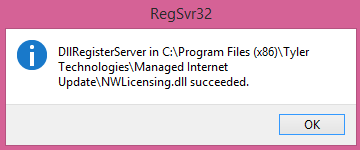
* When configuring the MIU on a local machine a DLL file needs to be manually registered after the install of the MIU. The easiest way to do this is below.
- Open a Run prompt.
- Type in this command: regsvr32 "C:\Program Files (x86)\Tyler Technologies\Managed Internet Update\NWLicensing.dll"
- In the string above, if you changed the MIU install directory to something other than C:\Program Files (x86) please change that part of the path.
- If you are successful you will see a dialog like this pop up.
Appendix B – Giving a User Log On as a Service Rights
- Open a Run prompt on the server.
- Type gpedit.msc. Press <Enter>.
- Select Computer Configuration > Windows Settings > Security Settings > Local Policies > User Rights Assignment
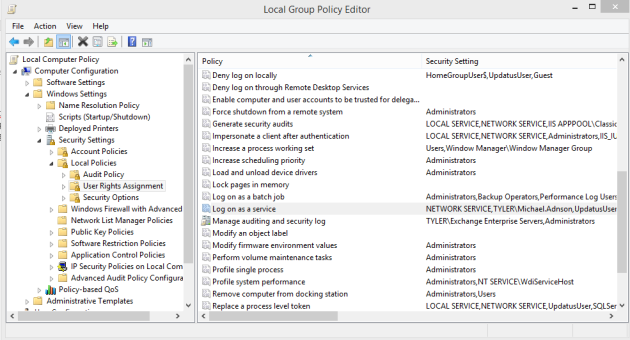
- Double-click Log on as a service policy.
- Click Add User or Group.
- Enter the account that will be running the service.
- Click OK.
Note: The user needs to have logged into the account on the server at least once to be able to log on as a service.